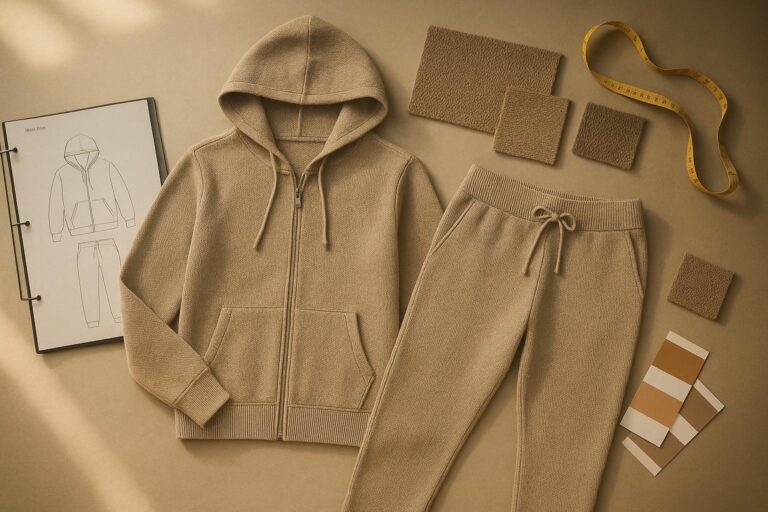
If you’re an emerging brand, “poncho” sounds simple until you try to sample one.
The silhouette is forgiving. The spec isn’t.
A couple centimeters on the neck opening, an edge finish that rolls, or a hood that pulls the neckline backward can turn a promising first proto into a slow, expensive sampling loop.
This guide is written for small teams sourcing knit ponchos. It does two jobs:
Give you a clear, construction-first map of poncho types (including ruana, serape, cape poncho, hooded poncho).
Help you write a cleaner tech pack and RFQ so your factory can quote accurately and your first sample round teaches you something useful.
Key Takeaway: The fastest sampling isn’t the simplest sketch. It’s the sketch with the fewest ambiguous specs.
Types of ponchos: the only classification that matters first (open vs closed)
In its simplest form, a poncho is essentially a single large sheet with an opening in the center for the head (and sometimes an added hood), as defined in Wikipedia’s “Poncho” overview.
From a production point of view, nearly every poncho-adjacent style fits one of two buckets:
Closed: over-the-head, head opening is the entry point.
Open-front: wrap or slit creating two front panels.
That one decision changes your pattern geometry, edge finishes, labeling, and how you manage fit.
Closed styles (over-the-head)
You’re controlling:
Head opening and neckline shape
Shoulder drop and where the fabric “breaks” on the body
Arm mobility (arm slits or not)
Open-front styles (wrap/slit)
You’re controlling:
Front slit depth and whether it’s stabilized
How the front panels hang (weight, drape, edge curl)
Closure (none, belt, toggle, buttons) and stress points
A straightforward consumer-level summary matches what you’ll see in production: a poncho is closed with a head opening, a ruana is open-front like a wrap, and a cape is open-front and often fastens at the neck, as described in Cotton Creek Farms’ “Ponchos, Capes, and Ruanas” guide.
The 9 spec decisions you should lock before you name a “poncho type”
Most sampling problems aren’t “poncho problems.” They’re missing-spec problems.
Here are the decisions that move cost, manufacturability, and lead time.
1) Use case and season
Write the scenario in one line:
“Fall layering piece for DTC, worn over tees and light sweaters.”
“Winter outer layer for cold but dry climates.”
This decides weight, yarn, and whether your customer expects a hood.
2) Material direction (fiber + yarn behavior)
Write this like a buyer, not a poet:
Fiber blend target (example: wool/nylon, cotton, acrylic blend)
Yarn type (worsted spun, woolen spun, brushed, bouclé)
Handfeel target (soft, crisp, lofty, compact)
If you don’t have final yarn yet, specify a range and reference: “match handfeel and thickness to our reference swatch.”
3) Fabric density / gauge target
Ponchos are large surface areas. If density is too low, they collapse and read cheap. If it’s too high, they feel stiff and heavy.
In your tech pack:
Give a gauge/density target as a range
Require a gauge swatch approval step
4) Construction level (single-piece vs panelled)
Single-piece tends to sample faster and has fewer failure points.
Panelled gives more control over silhouette, but introduces seams, matching, and twist risk.
5) Neckline engineering (comfort + recovery)
Necklines are where fit complaints come from.
Lock:
Shape (round, boat, V)
Binding/finish method
Stabilization approach
6) Arm mobility solution
Choose one:
No slits (cleanest look, least mobility)
Side openings (mobility, but needs clean finishing)
Arm slits (more practical, adds sewing and QC)
7) Edge finish (this drives “premium” and cost)
Pick one as default:
Clean self-edge with stabilization
Rib band (adds time but controls curl)
Binding/tape (adds BOM parts)
Fringe/tassels (adds labor and variance)
8) Sizing strategy (one size or graded)
Ponchos can be “one size,” but that doesn’t mean “no fit.”
The three measurements that decide how it feels on body:
Neck opening
Body length (front and back, if different)
Overall width
9) QC failure modes you’re trying to avoid
Call out what matters:
Pilling risk
Shrinkage tolerance
Edge rolling
Panel skew/twist
If you’re unsure which tests to require, specify that you’ll verify dimensional stability and appearance after wash.
Poncho types (and what they mean in a tech pack)
Below is a spec-first taxonomy. Each type includes:
What it is
When it makes sense for emerging brands
Spec notes that reduce sampling churn
1) Classic closed poncho (over-the-head)
What it is
A closed garment built around a head opening, with fabric draping around the body.
When it’s a good choice
You want an iconic drape with minimal trims
You can sell one-size credibly
You want fewer BOM line items
Spec notes that matter
Neck shape: round, boat, or V. Don’t just say “neck opening.”
Neck reinforcement: require stabilization so it doesn’t grow.
Arm mobility: decide “no slits” vs “arm slits” early.
Pro Tip: If you want arm mobility but don’t want visible slits, test a higher side opening start point. It often photographs cleaner.
2) Poncho sweater (knit poncho with sweater behavior)
What it is
A poncho that borrows sweater conventions: rib trims, shaped necklines, sometimes a defined shoulder line.
When it’s a good choice
You want knitwear polish without committing to a fully tailored cape coat
Your brand codes are “sweater-first,” not “outerwear-first”
Spec notes that matter
Treat the edges like a sweater: specify rib dimensions, recovery expectations.
Call out edge curl tolerance if you’re using jersey-based structures.
3) Cape poncho (poncho-cape hybrid)
What it is
A cape poncho sits between a poncho and a cape. A cape is generally more structured and often uses neck fasteners, while a poncho is simpler and closed; ClassicAlpaca’s poncho vs cape vs ruana comparison highlights this structure vs comfort tradeoff.
In practice, “cape poncho” usually means:
Cleaner neckline and optional neck fastening
More deliberate shoulder shaping
Better hanger and photo-read for premium positioning
When it’s a good choice
You need it to look intentional on hanger and model
You want a more tailored upper body without sleeves
Spec notes that matter
Neck fastening: button/toggle/hook. Specify placement and reinforcement.
Front opening: fully open vs partial overlap.
Arm slits: location and length.
4) Hooded poncho
What it is
A poncho with a hood.
When it’s a good choice
Your customer expects function, not just styling
Your brand aesthetic can carry added bulk at the neckline
Spec notes that matter
Hood volume: small changes decide whether it looks sharp or sloppy.
Hood attachment seam: stabilize it. This seam takes stress.
Weight balance: a heavy hood can pull the neckline backward.
⚠️ Warning: Don’t approve a hooded poncho sample without wearing it for 10 minutes. Neckline creep shows up with movement, not on a dress form.
5) Ruana (open-front wrap)
What it is
A ruana is an open-front wrap, usually created by a slit that forms two front panels. That open-front behavior is the clearest practical answer to “poncho vs ruana.”
When it’s a good choice
You want easier layering and fewer “I hate pulling it over my head” returns
You want more styling flexibility without adding sleeves
Spec notes that matter
Front slit depth: define it from HPS or from neckline.
Slit reinforcement: specify bar tacks or stabilization at slit end.
Edge stabilization: open-front wraps love to stretch and ripple.
Optional closure: belt loops, hidden snaps, pin-friendly zones.
6) Serape (blanket-style wrap worn like a poncho)
What it is
In modern fashion language, “serape” is often used for a rectangular, blanket-like wrap worn similarly to a poncho. For clarity, treat “serape vs poncho” as a geometry question:
A serape is typically a rectangular wrap/blanket silhouette.
A poncho is a garment built around a defined head opening.
When it’s a good choice
You want a graphic surface (stripes, blocks) that reads from far away
You want a flatter development approach with simpler geometry
Spec notes that matter
Decide whether you’re making a true closed poncho (head opening) or a wrap.
If you add fringe/tassels, specify length tolerance and attachment method.
7) Rain poncho (included for completeness)
A rain poncho is defined by watertight material intended to keep the body dry. If you’re a knitwear brand, keep it as a separate product strategy.
How to choose the right poncho type (a decision framework)
This is the part you can hand to a teammate.
Step 1: Choose open vs closed based on return risk
If you’re worried about neckline comfort and “it feels weird to put on,” lean open-front (ruana).
If you want iconic drape and simple styling, classic closed.
Step 2: Decide what you’re actually selling: drape, structure, or function
Drape-led: classic poncho, ruana
Structure-led: cape poncho
Function-led: hooded poncho
Step 3: Lock a minimum viable spec for sample round 1
Round one isn’t for perfection. It’s to validate:
silhouette proportions
edge behavior
weight and drape
Minimum viable spec list:
Construction type + flat sketch
Neck opening spec and finish
Body length (front/back)
Width
Edge finish
Yarn direction (even if provisional)
Step 4: Build a lead-time model you can actually manage
Lead time usually moves with four things: material sourcing and availability, pattern complexity and prototyping, QC and final inspections, and communication speed.
That’s not theory. It’s exactly how manufacturers explain scheduling risk, including in L&J Design Manufacturing’s breakdown of what affects contract sewing lead times.
Translate it into actions you control:
Choose in-stock yarns for sampling
Reduce trim variety
Approve quickly and give consolidated feedback
Define QC checks upfront
Cost and manufacturability levers (what changes your quote)
Ponchos look simple, but the quote changes fast when you add labor steps.
Here are the levers that typically matter most.
Levers that usually increase cost and risk
Fringe or tassels with tight tolerance
Hood + multiple seam joins near neckline
Multiple color blocks that require clean transitions n- Custom trims with their own MOQs
Too many SKUs (colors x sizes) for a small first run
Levers that usually reduce cost and speed sampling
In-stock yarns for proto
One consistent edge finish across the whole style
One-size strategy with clear measurement definitions
Simple geometry and fewer seams
A sampling-ready tech pack checklist (copy/paste)
Use this as a section in your tech pack or RFQ email.
Measurements and geometry
Neck opening: circumference and shape
Front length and back length
Overall width
Hem curve or straight line spec
Arm slit length and placement (if any)
Construction
Open-front or closed
Panel count and seam placement
Reinforcement areas (neck, slit ends)
Yarn and fabric behavior
Fiber blend target
Yarn count/weight target
Gauge target range
Drape target (reference swatch if available)
Finishing and trims
Edge finish method
Labels and placement
Closures (toggle/buttons/snaps) and reinforcement
Fringe/tassels: length + attachment method
Color and sizing strategy
SKU list (colorways, sizes)
One-size definition and intended fit range
QC checks
Appearance after wash (pilling, fuzzing)
Dimensional stability check
Visual inspection points (edge rolling, seam puckering)
Knit structures that work well for ponchos (and what to watch)
If you’re sourcing knit ponchos, don’t treat “fabric” as a single choice. The structure decides drape, edge behavior, snagging, and how forgiving the garment is after wash.
Jersey-based structures (single jersey, plain knit)
Why brands choose it:
Clean surface for color and graphics
Faster knit time than heavily textured structures
What can go wrong:
Edge curl at hems and openings
The whole garment can look too limp if density is low
Spec notes to reduce churn:
State your curl tolerance (or pick an edge finish that controls it)
Require a swatch in the final structure with your target finishing so you’re not guessing from an unwashed sample
Rib structures (1×1, 2×2, wide ribs)
Why brands choose it:
Better recovery at necklines and edges
A “sweater-like” hand that reads premium quickly
What can go wrong:
Ribs can grow in length under their own weight on large pieces
Visual distortion if the poncho is too wide for the rib scale
Spec notes:
Specify whether ribs are decorative only or structural (used to control stretch)
Call out whether the rib direction matters (vertical vs horizontal read)
Cable and textured stitches
Why brands choose it:
Strong visual identity without prints
Higher perceived value
What can go wrong:
Adds bulk; changes how the poncho hangs on shoulder
More opportunity for inconsistency if the program and yarn behavior aren’t locked
Spec notes:
Provide a clear photo reference and name the cable repeat size
Ask for a swatch that includes the cable + the edge finish together
Jacquard and intarsia (graphics)
Why brands choose it:
Brand codes and bold motifs
Clear retail storytelling
What can go wrong:
Extra yarn management increases time and complexity
Backside finishing expectations need to be explicit
Spec notes:
Specify whether the reverse side will be visible or not
Define the edge finish and how you want yarn tails handled
Measurement tables you can reuse (one-size and graded)
Ponchos are “forgiving,” but your factory still needs a table to build and verify against.
Below are templates you can copy into your tech pack. Use them as a structure, not as universal numbers.
One-size poncho template (minimum viable)
Point of measure | How to measure | Target | Tolerance |
|---|---|---|---|
Neck opening circumference | along finished neckline | ___ cm | ± ___ cm |
Front length | HPS to hem | ___ cm | ± ___ cm |
Back length | HPS to hem | ___ cm | ± ___ cm |
Body width | hem to hem, laid flat | ___ cm | ± ___ cm |
Arm opening/slit length | along opening | ___ cm | ± ___ cm |
Add one line for “intended fit range” (example: XS–L) so everyone aligns on the goal.
Graded sizes template (when you must)
If you’re grading, keep grading logic simple. The more sizes you add, the more ways you can lose time.
Point of measure | XS | S | M | L | XL |
|---|---|---|---|---|---|
Neck opening circ. | ___ | ___ | ___ | ___ | ___ |
Front length | ___ | ___ | ___ | ___ | ___ |
Back length | ___ | ___ | ___ | ___ | ___ |
Body width | ___ | ___ | ___ | ___ | ___ |
When you grade a poncho, you’re really grading drape. That’s why swatch approval and proto wear-test matter more than perfect size math.
BOM and trim decisions that sneak into ponchos
Ponchos look like “one big piece,” but the BOM can still get messy. The trap is adding little upgrades that each introduce a separate minimum, lead time, or QC step.
Common BOM items to plan for:
Main yarn(s)
Neckline stabilization (tape, binding yarn, facing)
Labels (main, size/care, country of origin)
Closures (for cape ponchos or optional ruana closures)
Hangtags and packaging inserts
A simple rule for emerging brands: if a trim has its own MOQ, decide whether it belongs in sample round 1 or round 2.
Sampling workflow: the checkpoints that keep you on schedule
If you’re trying to hit a season, you need a repeatable approval cadence. Here’s a practical flow for ponchos.
Checkpoint 1: swatch approval (structure + gauge + finishing)
Done when:
The handfeel matches your intent
The edge finish behaves as expected
You’ve confirmed shrinkage behavior enough to move forward
Checkpoint 2: first proto (silhouette + neck comfort)
Done when:
The neckline sits comfortably and doesn’t creep
Width and length read correctly on body
Arm mobility meets expectations for the type (closed vs open-front)
Checkpoint 3: revised proto (details + QC risk)
Done when:
Edge finishes are consistent
Any slit ends, hood joins, and closures are reinforced properly
You can write a clear QC checklist that matches what you see
Checkpoint 4: pre-production sample (repeatability)
Done when:
You’re confident the bulk will match the approved sample
You’ve removed spec ambiguity (no “approx” measurements left)
Packaging and labeling are confirmed
Where Knitwear.io fits (brand mention, minimal)
If you want to shorten your first sampling loop, it helps to use a workflow designed for small-batch development.
A practical starting point is Knitwear.io quick sampling, especially if you’re moving from a sketch or reference photo into a first sample and want fewer cycles of back-and-forth.
If you’re still choosing partners, these two guides are useful for setting evaluation criteria:
And if sustainability is part of your positioning, build certification questions into the RFQ early. This checklist-style overview on sourcing sustainable knitwear for small businesses helps structure that conversation.
FAQ (sourcing-focused)
Is a ruana a poncho?
They’re related silhouettes, but the construction behaves differently. In practical terms, “poncho vs ruana” comes down to closed vs open-front.
What’s the biggest spec mistake with ponchos?
Leaving the neck opening vague. It drives comfort, how it sits on shoulder, and whether the whole garment shifts when the wearer moves.
Should I make a poncho one-size?
Often yes, but define the intended fit range and lock the three measurements that matter: neck opening, length, and width. “One size” without measurements creates inconsistent samples.
What makes a hooded poncho harder to produce?
The hood adds bulk, stress at the attachment seam, and balance issues that can pull the neckline. You’ll typically need more stabilization work than a classic poncho.
Key takeaways
Start with open-front vs closed. It’s the foundation of the spec.
Each “type” is really a bundle of decisions: neckline, edges, mobility, and finishing.
For fast sampling, lock the minimum viable spec and approve a gauge swatch.
Lead times are driven by materials availability, complexity/prototyping, QC, and communication speed.
Next steps
Pick one poncho type and write a one-page minimum viable spec.
Decide your edge finish and neckline stabilization before you request a quote.
If you want a faster first sample, start with the Knitwear.io quick sampling workflow and attach your sketch + measurement list.